
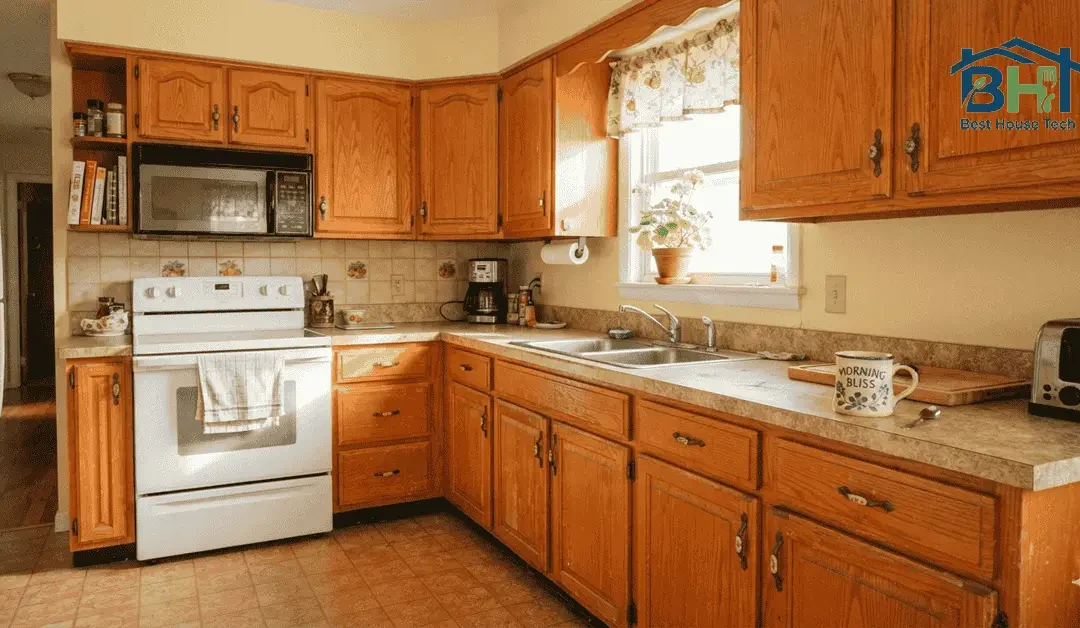
If you’ve spent any time standing in your kitchen with a mug of coffee, staring at those honey-oak cabinets and wondering how on earth they became the bane of your existence, you are definitely not alone.
Most of us who bought homes built in the 1990s or early 2000s inherited the exact same setup: solid oak cabinets, raised-panel doors, a distinct orange-y finish, and tiny brass knobs that haven’t looked stylish in twenty years. They’re heavy, sturdy, and built to last forever. And that’s the real catch, isn’t it? The wood itself is in fantastic shape, which makes tearing them out feel like a huge waste of money. A full kitchen remodel can easily run $25,000 to $50,000, and honestly, who wants to spend that if the bones are already good?
Learning how to make oak kitchen cabinets look modern without tearing your kitchen apart is one of the best home projects you can tackle. You don’t need a contractor or a massive bank account to give your space a fresh, elevated look. Whether you have an afternoon, a full weekend, or a modest DIY budget, there are plenty of ways to tone down that dated honey finish and make your kitchen feel bright, current, and intentional.
Why Oak Cabinets Feel So Dated (and What We’re Working With)
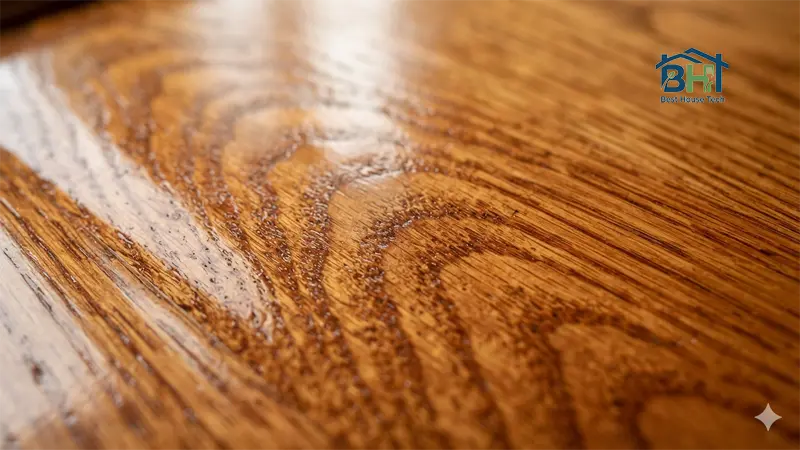
Before jumping into solutions, it helps to understand why honey oak feels so stuck in the past. It’s usually not the wood itself—it’s a combination of three specific elements:
The Orange-y Polyurethane Tone: Over time, the clear protective topcoats used in the 80s, 90s, and 2000s yellow with age and light exposure. What started as warm oak turned into an aggressive honey-amber shade.
Heavy, Prominent Wood Grain: Oak has a deep, cathedral-like grain pattern. When combined with a high-gloss yellow finish, that grain leaps out at you from across the room.
Traditional Door Profiles and Hardware: Raised-panel cathedral doors combined with small, ornate brass or porcelain knobs scream “builder-grade 1995.”
The goal here isn’t to pretend oak doesn’t exist, but rather to shift the focus. By changing the finish, updating the surrounding elements, or swapping out hardware, you turn oak from a dated feature into a warm, modern asset.
Quick Wins That Cost Almost Nothing
If you aren’t ready to grab a paintbrush or commit to a massive overhaul, start with these low-cost, high-impact fixes. You can easily knock these out in a single afternoon.
- Give Them a Deep Clean and De-Glossing
Kitchen grease, cooking oils, and smoke build up on cabinet surfaces over the years, making the amber finish look even darker and dirtier. Wash your cabinet doors using a safe method on how to clean wood kitchen cabinets without damaging the finish, then wipe them dry. You’d be surprised how much brightness comes back just by removing decades of grime. - Remove a Few Upper Doors for Open Shelving
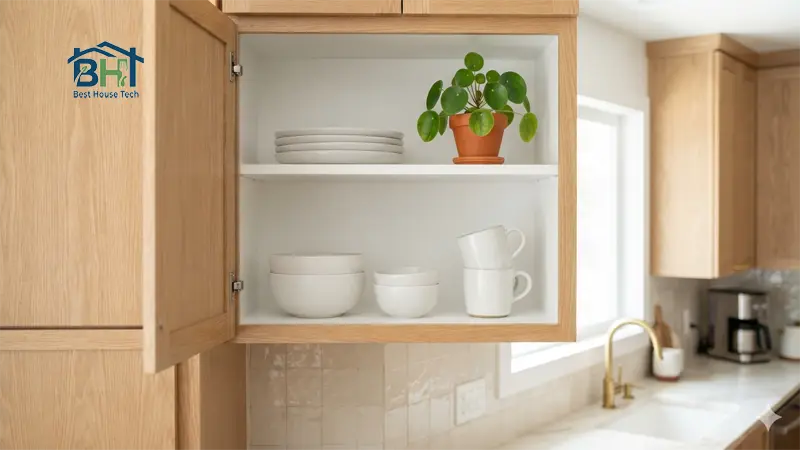
This is a trick I tried in my own kitchen, and it instantly lightened up the whole room. Take off the doors from one or two upper cabinet frames—ideally near the sink or coffee corner. Paint or paper the inside back wall a clean off-white or soft warm grey, and display your everyday white dishes, clear glass jars, or small potted plants. It breaks up the wall of heavy orange wood and gives the space an open, airy feel. - Change Your Kitchen Lighting Color Temperature
This is the trick that surprised me most. If you’re using warm yellow lightbulbs (2700K) in your kitchen, they are actively amplifying the yellow and orange tones in your oak wood. Swap those bulbs out for neutral daylight bulbs around 3000K to 3500K. Neutral white light cools down the warm undertones in the room without making your kitchen feel like a doctor’s office.
Updating Cabinet Hardware and Fixtures
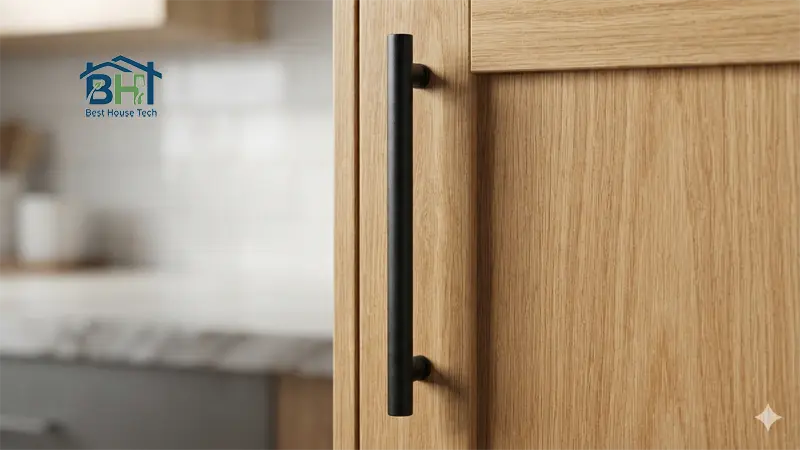
If you only do one thing from this guide, make it this one. Replacing your hardware offers the single highest return on effort when updating honey oak.
Old oak cabinets usually came with tiny round brass knobs or wooden handles that blended right into the door. Swapping those out creates a strong, modern visual anchor that pulls attention away from the heavy grain.
| Hardware Finish | Why It Works With Oak | Best Style Choice |
|---|---|---|
| Matte Black | High contrast; grounds warm oak | Long slender pulls, boxy T-bars |
| Brushed Brass | Modern warm tone; intentional | Sleek bar pulls, minimalist knobs |
| Brushed Nickel | Cool undertone; tones down orange | Simple, clean-lined bar handles |
Style Rules for Modernizing Oak Hardware
How to Make Oak Kitchen Cabinets Look Modern with Paint
Choosing the Right Modern Paint Color
While bright stark white is a classic choice, super-stark whites can sometimes look too stark against remaining warm wood elements in a house. Instead, consider these modern tones that pair brilliantly with oak’s natural texture:
Warm Off-Whites and Greiges: Creamy whites or soft grey-beige shades feel luxurious, modern, and inviting.
Sage and Olive Greens: Soft green tones look incredible with wood, creating an organic, earthy kitchen aesthetic that feels custom-built.
Muted Navy or Charcoal: Darker tones absorb light and make the heavy grain pattern much less noticeable, giving you a moody, high-end look.
The Truth About Oak Wood Grain and Paint
Oak has deep open grain. Paint will change the color of your cabinets, but the physical texture of the wood grain will still be visible beneath the paint unless you fill it.
Most people actually like a little bit of visible grain because it looks like real painted wood rather than cheap plastic laminate. But if you want a glassy, ultra-smooth modern finish, you will need to apply a grain-filling compound over the wood after sanding and before priming.
Step-by-Step Painting Essentials
Remove everything: Take off doors, drawers, and all hardware. Number each door so you know where it goes back!
Clean thoroughly: Remove every trace of grease with a heavy-duty cleaner.
Light Sanding: You don’t need to sand down to bare wood, but you do need to dull the glossy clear coat so primer can stick. Use medium-grit sandpaper.
Use a Shellac or Oil-Based Stain-Blocking Primer: Oak is full of natural tannins that will bleed through water-based primers, turning your nice white paint pink or yellow over time. Apply a high-quality stain-blocking primer first.
Apply Two Topcoats: Use an enamel-based cabinet paint designed specifically for doors and trim for a durable, washable finish.
Staining or Gel-Staining Oak to Shift the Tone
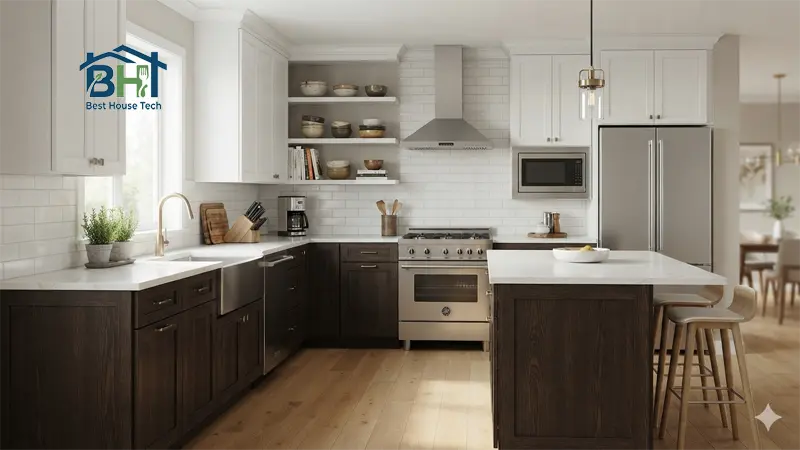
If you love wood texture and don’t want to completely cover your cabinets in paint, staining or gel-staining is your best friend.
Traditional liquid stains require stripping the old finish down to raw wood, which is messy and extremely labor-intensive. Gel stain, on the other hand, sits on top of the existing finish like a tinted glaze. You only need to give the cabinets a light sanding to scuff up the surface before applying it.
Color Options for Gel-Stain
Rich Espresso or Dark Walnut: Shifting your cabinets to a deep, dark brown hides the orange undertones entirely and creates a sophisticated, dramatic kitchen.
Muted Charcoal or Ash: A cool grey-brown gel stain neutralizes orange tones and gives oak a trendy, weathered look.
Two-Tone Setup: Gel-stain your lower cabinets a dark espresso tone, and paint your upper cabinets a soft off-white. This “tuxedo” cabinet style is very modern and grounds the room.
Pairing Oak Cabinets with Modern Countertops, Backsplash, and Wall Paint
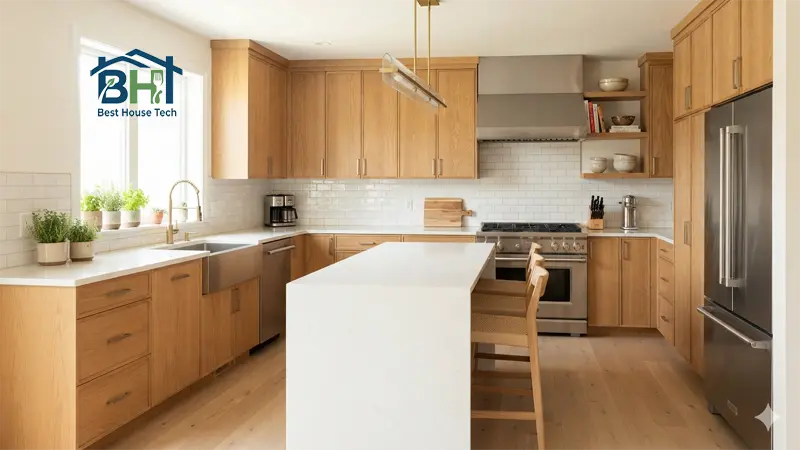
Sometimes the fastest fix isn’t changing the cabinets themselves, but updating what’s directly around them. A dated countertop or pattern-heavy 1990s backsplash can make oak look much worse than it actually is.
Countertops
White Quartz with Subtle Veining: Cool or warm white quartz countertops create an instant contrast with dark or warm oak. The clean, solid surface balances out the wood’s busy grain.
Honed Black or Dark Granite: Matte black or dark slate countertops give oak an industrial, high-end architectural feel.
Backsplash
Classic White Subway Tile: Simple, clean, and timeless. Using white tile with neutral grout brightens the space and pulls the eye away from orange cabinet tones.
Vertical Stacked Tile: Laying subway or finger tiles vertically instead of horizontally gives the kitchen an instant modern update.
Wall Paint Colors
Steer clear of warm yellows, beige, or gold paint on the walls—these will only reflect off the cabinets and make them look more orange.
Cool Whites and Light Greys: Neutral whites on the walls absorb light and cool down the room.
Soft Blue-Greys: Blue is directly opposite orange on the color wheel. A pale blue-grey wall color neutralizes honey oak tones beautifully.
Modernizing the Cabinet Doors Themselves
If your budget allows for a slightly larger project, modifying or replacing the cabinet door fronts gives you a brand-new kitchen look at a fraction of full replacement costs.
Add Trim for a Shaker Look
If you have flat, plain slab oak doors, you can glue thin strips of craft plywood around the edges to turn them into popular Shaker-style doors before painting.
Door Refacing (Swapping Just the Fronts)
The cabinet boxes themselves are usually solid oak and built like tanks. If you hate the arched “cathedral” panels on your upper doors, you can order new custom-sized Shaker or flat-panel doors online, attach them to your existing cabinet boxes, and paint or stain everything to match. You get the look of brand-new custom cabinetry while keeping your existing layout and saved thousands of dollars.
What NOT to Do When Updating Oak Cabinets
It’s easy to make a few costly mistakes when tackling a project like this. Avoid these common pitfalls:
Don’t Skip the Stain-Blocking Primer: If you decide to paint, using a standard wall primer will lead to yellow tannin spots bleeding through your fresh paint within weeks.
Don’t Buy Dainty Hardware: Oak is a heavy, thick wood with strong grain. Tiny, delicate pulls look lost on oak doors. Choose substantial, solid-feeling hardware.
Don’t Forget About the Side Panels: Many oak cabinet boxes have thin fake-wood laminate panels on the exposed sides. Make sure you test paint or gel stain on these areas first, as laminate absorbs finish differently than solid wood face frames.
Don’t Rush the Drying Times: Cabinet enamel paint takes time to fully cure and harden. Even if it feels dry to the touch after two hours, give it a few days before reinstalling hardware and slamming doors shut.
Budget and Time Expectations
To help you plan, here is a realistic breakdown of what each approach costs and how long it takes for a standard-sized kitchen:
| Update Method | Estimated Cost | Time Required | Difficulty Level |
|---|---|---|---|
| Hardware Swap | $50 – $200 | 2 – 3 Hours | Very Easy |
| Lighting & Paint Swap | $100 – $300 | 1 Weekend | Easy |
| Gel-Staining Cabinets | $150 – $300 | 2 – 3 Days | Moderate |
| Full Cabinet Painting | $200 – $500 (DIY) | 4 – 7 Days | Moderate to Hard |
| Door Refacing (Fronts, DIY) | $1,500 – $4,000 | 1 – 2 Weekends | Moderate |
Creating a Cohesive Modern Kitchen Layout
Once you’ve updated your cabinets or surroundings, take a step back and look at the whole space. To make the whole kitchen feel unified and high-end:
Update Your Sink Faucet: Match your new cabinet hardware finish with your kitchen faucet. A sleek matte black or brushed brass gooseneck faucet ties the room together immediately.
Add Warm Textiles: Bring in a runner rug with soft, muted tones in front of the sink. It covers up old flooring and softens hard cabinet lines.
Incorporate Modern Accessories: Clear off clutter from the countertops. Place a wooden cutting board against the backsplash, display your polished cookware if you’ve dealt with stubborn spots before, check our guide on how to remove sticky residue from stainless steel pan, and add a small lamp in a corner for warm ambient accent lighting at night.
Frequently Asked Questions
Can I paint oak cabinets without sanding?
While some specialty paints claim “no sanding required,” a light scuff-sanding is always recommended for oak cabinets. Kitchen cabinets get heavy use, grease exposure, and moisture. Sanding breaks the old clear-coat shine so your primer can grip properly.
How do I hide the wood grain on oak cabinets completely?
To make oak grain completely disappear before painting, apply a thin coat of wood filler or drywall spackle across the surface using a putty knife. Once dry, sand it smooth so it fills the deep pores of the wood. Apply primer over the smoothed surface.
Is honey oak coming back in style?
Warm wood tones are definitely trending again, but not the shiny, orange-amber cathedral cabinets from 1995. Modern wood kitchens focus on flat-panel or shaker doors with light, natural oak, white oak, or matte charcoal finishes paired with minimalist hardware.
What is the best modern hardware finish for honey oak?
Matte black is widely considered the best choice because it provides strong visual contrast, grounds the bright orange-yellow tones, and instantly modernizes the room. Brushed brass is a close second for a warmer, upscale look.
How can I make my oak cabinets look lighter without painting?
You can apply a white-tinted wax, a light grey gel stain, or use a lime-wash technique after lightly sanding down the clear coat. This tones down the bright orange undertone and gives the oak a soft, drift-wood style finish.
Take a look at your kitchen, pick a starting point that fits your time and budget, and just take it one step at a time. Whether you start with a simple hardware swap this Saturday or plan a full weekend painting session next month, you’ll be amazed at how much life you can breathe into your space without spending a fortune!