

That dull, scratched-up finish on your kitchen table didn’t happen overnight – it’s years of hot mugs, dropped forks, and Sunday morning coffee rings finally catching up with the wood. The good news is you don’t need a workshop full of tools or a weekend of misery to fix it. With the right steps, in the right order, you can strip that tired finish down to bare wood and build it back up into something that looks — and feels – brand new.
This guide walks you through the whole process, from figuring out if your table is even worth saving to picking a finish that can actually survive daily use in a kitchen.
Is Your Table Worth Refinishing?
Before you buy a single supply, take a minute to check what you’re working with. Flip the table over, or look underneath the edge, to see what it’s made from.
Solid Wood vs. Veneer
Solid Wood: Woods like oak, maple, pine, walnut, and cherry are ideal for refinishing. Solid wood can be sanded down to bare wood multiple times over its lifetime. Oak is particularly durable for table refinishing; if you have matching kitchen features, you can also learn how to make oak kitchen cabinets look modern.
Wood Veneer: Veneer is a thin layer of real wood glued over particleboard or plywood. You can still refinish veneer, but you must avoid aggressive power sanding. Sanding too deep will destroy the thin top layer, leaving the underlying particleboard exposed.
How to Tell the Difference
Look closely at the edge of the tabletop. A solid wood board shows a continuous grain pattern running entirely through the edge and corners. Veneer typically reveals a thin, distinct join line where the top sheet meets the substrate material underneath.
Tools and Materials You’ll Need
You don’t need exotic equipment – most of these items are readily available at your local hardware store or home center.
- Mild dish soap and warm water
- Chemical paint/varnish stripper (Methylene-Chloride-Free or Citrus-based) or a Random Orbital Sander
- Plastic and metal putty knives/scrapers
- Sandpaper sheets or discs in 80, 120, 220, and 400 grit
- Stainable wood filler
- Tack cloth (microfiber cloth)
- Pre-stain wood conditioner (recommended for softwoods like pine)
- Wood stain (oil-based or water-based, optional)
- Kitchen-grade protective topcoat (Polyurethane or Hardwax Oil)
- Personal Protective Equipment (PPE): Chemical-resistant rubber gloves, safety glasses, and an N95 or organic vapor respirator mask
- Drop cloths or plastic sheeting to protect flooring
Step 1: Clean the Table and Remove Hardware
Start by thoroughly cleaning the table with warm water and a small amount of mild dish soap. This removes buildup like grease, oils, and cooking residue that could clog your sandpaper or prevent strippers and finishes from absorbing evenly. Allow the table to dry completely.
If you’re working on other kitchen woodwork like cabinets, check out our guide on how to clean wood kitchen cabinets without damaging the finish.
If your table includes drawers, metal leaves, hinges, or decorative hardware, remove them now or mask them securely with painter’s tape. Strippers and wood dust can easily corrode or damage metal finishes.
Step 2: Strip or Sand Off the Old Finish
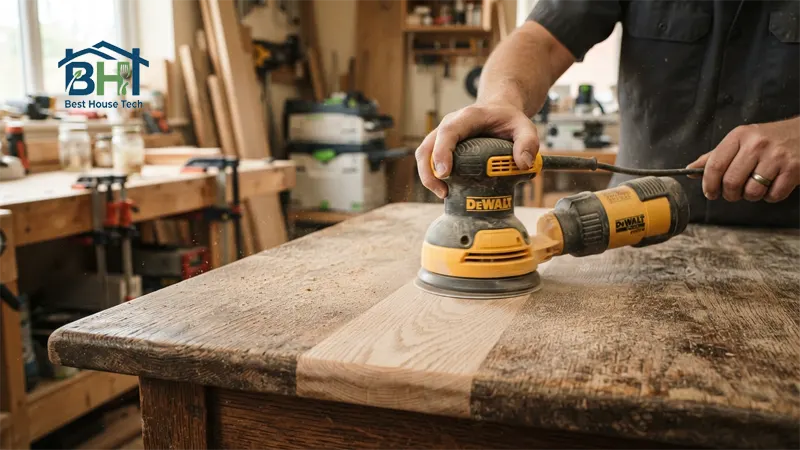
Removing the worn-out finish using a random orbital sander down to bare wood.
To get down to bare wood, you can choose between chemical stripping and mechanical sanding.
Option A: Chemical Stripper
Chemical stripping softens old varnish, polyurethane, or paint so it can be scraped away easily without wearing down the wood underneath. It is usually the safest method for veneer or detailed, turned table legs.
- Important Safety Note: EPA regulations and European Union REACH laws strictly prohibit consumer sales of strippers containing methylene chloride due to serious toxic fume hazards. Choose safe, modern alternatives like soy-based or citrus-based strippers, and always work in a well-ventilated space.
Option B: Mechanical Sanding
If you prefer a chemical-free method, use a random orbital sander equipped with 80-grit sandpaper to break through the existing finish. This method takes patience, manual effort, and extra care around carved details and edges.
Pro Tip: Ensure every trace of the old coating is removed. Any remaining old finish will prevent new stain from absorbing, leading to splotchy, cloudy patches.
Step 3: Repair Dents, Gouges, and Loose Joints
With the bare wood exposed, you can easily inspect and repair hidden structural damage.
- Dents and Scratches: Fill gouges using a stainable wood filler applied with a putty knife. Slightly overfill the area to account for shrinkage as it dries.
- Loose Structural Joints: If the legs or frame feel wobbly, take this opportunity to apply wood glue to open joints, clamp them securely, and let them dry overnight before proceeding.
Step 4: Sand the Surface Smooth
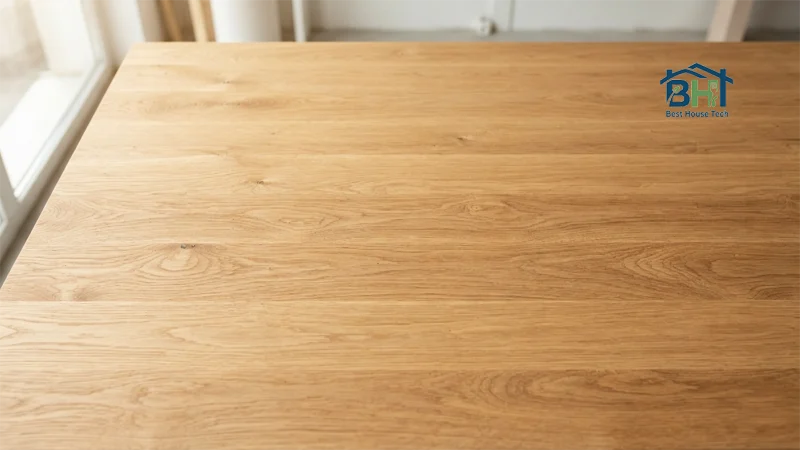
Sanding with 220-grit sandpaper creates an ultra-smooth surface ready for staining.
Sanding creates a smooth surface and opens the wood grain to absorb stain evenly. Progress sequentially through your sandpaper grits:
- 80-Grit: Use this to level out wood filler repairs and remove deep scratches.
- 120-Grit: Smooth out the harsh scratches left behind by the 80-grit paper.
- 220-Grit: Perform a final pass to create a silk-smooth surface ready for staining.
Crucial Sanding Rules
- Sand with the Grain: Never sand across the grain direction, as cross-grain scratches will become highly visible once stain is applied.
- Clean Between Grits: Thoroughly wipe the table with a fresh tack cloth after each sanding stage to remove loose dust particles that could ruin your finish.
Step 5: Apply Wood Stain (Optional)
If you love the natural look of bare wood, skip directly to Step 6. If you want to alter or deepen the wood tone, apply a wood stain now.
- Apply Pre-Stain Conditioner (If using softwood): Softwoods like pine or fir tend to absorb stain unevenly. A pre-stain conditioner ensures balanced, streak-free absorption.
- Apply the Stain: Use a clean rag, foam applicator, or natural bristle brush to apply the stain evenly in the direction of the wood grain.
- Wipe Excess: Allow the stain to penetrate for 3 to 5 minutes, then wipe off any excess liquid with a dry cloth to prevent blotchiness. Let it dry according to the manufacturer’s instructions.
Step 6: Apply a Durable, Kitchen-Grade Topcoat
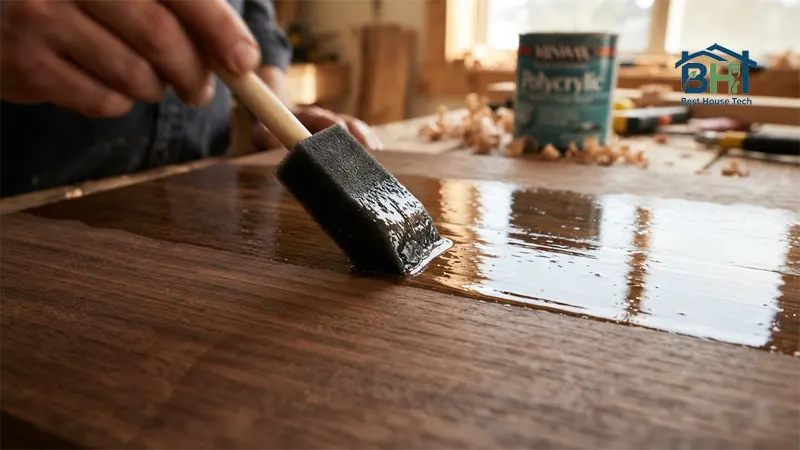
Applying a clear polyurethane topcoat to protect the kitchen table from heat and spills.
A kitchen table requires a durable topcoat capable of withstanding heat, liquids, and frequent cleaning chemicals.
Choosing the Right Topcoat
- Oil-Based Polyurethane: Offers maximum resistance against moisture, heat, and heavy daily use. It imparts a warm amber tone but takes 8 to 24 hours per coat to dry and emits noticeable VOC fumes.
- Water-Based Polyurethane: Dries rapidly, cleans up with water, and stays crystal-clear over time. It offers good durability, though slightly less heat tolerance than oil-based formulas.
- Hardwax Oil (e.g., Rubio Monocoat, Osmo): Provides a natural, tactile wood feel that is easily spot-repaired, though it requires periodic reapplication.
Topcoat Application Process
- Apply at least 2 to 3 thin coats using a high-quality brush or applicator.
- Lightly scuff-sand the surface with 400-grit sandpaper between coats to remove dust nibs and promote adhesion.
- Always wipe away sanding dust with a tack cloth before applying the next coat.
Food Safety Note: While topcoats feel dry to the touch within hours, they require a full curing period (often 2 to 4 weeks depending on humidity and product type) to achieve maximum hardness and complete chemical food safety. Avoid placing heavy hot items or wet glassware directly on the table during this time.
Common Refinishing Mistakes to Avoid
Avoid these common DIY pitfalls for a professional finish:
- Skipping Initial Cleaning: Grease left on the wood weakens finish adhesion and causes premature peeling. For heavy grease buildup before refinishing or cleaning nearby woodwork, using the best degreaser for kitchen cabinets makes the job much easier.
- Sanding Across the Grain: Leaves unsightly horizontal scratches visible through the topcoat.
- Rushing Cure Times: Applying coats too quickly traps moisture beneath, resulting in cloudy finish layers.
- Neglecting PPE: Chemical strippers and fine wood dust pose health hazards; always wear masks, eye protection, and gloves in ventilated spaces.
Project Timeline: How Long Does It Take?
Expect a full weekend commitment to complete a table refinishing project properly:
- Day 1: Stripping, deep cleaning, and primary structural repairs.
- Day 2: Fine sanding, stain application, and first protective topcoat layer.
- Days 3–5: Final topcoat applications and drying intervals.
Rushing the drying and curing process is the primary reason DIY wood refinishing projects fail prematurely.
Frequently Asked Questions (FAQ)
Can I refinish a table without completely removing the old finish?
No. Applying fresh stain or sealers over an existing degraded finish prevents proper absorption, causing the new layer to bubble, peel, or look uneven over time.
Do I really need to sand between every coat of polyurethane?
Yes. Light scuff-sanding eliminates dust nibs, levels brush marks, and creates microscopic grooves that help subsequent polyurethane coats bond strongly.
Is a refinished kitchen table food-safe?
Once the topcoat has fully cured according to manufacturer instructions, it creates an inert, safe barrier for standard dining use. Never use the finished surface directly as a cutting board.
Final Thoughts
Refinishing a wooden kitchen table requires patience, structured steps, and the right materials. By properly preparing the bare wood, sanding with the grain, and protecting it with a kitchen-grade topcoat, you can transform a worn-out piece of furniture into a durable, beautiful centerpiece for your home that lasts for decades.